
N-Track Studio 1.2.6 serial key or number

N-Track Studio 1.2.6 serial key or number
noseintel’s diary

This tutorial is a step-by-step guide to install the new ABAP Development Tools (ADT) on Eclipse™ ( Kepler version) on an Apple® computer running the Mac OS® X Lion operating system. Introduction Users of personal computers running one of the latest versions of Microsoft® Windows® operating system may also benefit from the information presented on this tutorial. This document is divided into twelve sections.
This tutorial is a step-by-step guide to install the new ABAP Development Tools (ADT) on Eclipse™ (Kepler version) on an Apple® computer running the Mac OS® X Lion operating system.
The second one shows the prerequisites for the installation of the new ABAP Development Tools. The third section presents a way of verifying the SAP BASIS and Kernel release versions. Directions to downloading the SAP GUI Java and the Eclipse Standard 4.3.1 are presented on the fourth and fifth sections, respectively. The sixth section details the installation steps of the ABAP Development Tools.
The seventh section describes a first test on the ADT installation. The eighth section presents the steps to connect the ADT to the SAP back-end system, thus solving the problem that occurs on the first test on section 7. A second and final test of the ADT installation is performed on the ninth section. The tenth section presents the conclusion of this document. Finally, the eleventh section shows the disclaimer and the trademark notices of this document are presented on the twelfth and last section. Prerequisites Important: during the installation of the ABAP Development Tools (section 6), you’ll need to keep your computer connected to the Internet. Also, having administrative rights on your computer won’t hurt either.
ABAP Development Tools minimum requirements:. Eclipse Platform: Juno, version 4.2 or higher. Operating System: Windows OS (XP, Vista, or 7) 32 or 64 Bit, or Apple Mac OS X 10.6, Universal 64 Bit, or Linux distribution.
Java Runtime – JRE version 1.6 or higher, 32 Bit or 64 Bit. SAP GUI – for Windows OS: SAP GUI for Windows 7.20, patch level 9 or higher; for Apple Mac or Linux OS: SAP GUI for Java 7.20, revision 6 or higher. Microsoft VC Runtime – for Windows OS: DLLs VS2010 for communication with the back-end system is required. Note: Install either the ‘x86’ or the ‘x64’ variant, accordingly to your 32 or 64 Bit Eclipse installation. SAP BASIS release 731 service pack level 0004 – or later. SAP Kernel release 720 – or later.
SAP NetWeaver AS ABAP 7.03 SAP GUI for Java – or later. Verifying your SAP BASIS and Kernel Releases The member posted a. As he states, the SAP BASIS version must be at least the release 731, Service Pack Level 0004.
Also, the SAP Kernel version must be at least the release 720. To verify your SAP Basis version, navigate in the menu to System Status. The System: Status window opens. On this window, click on the Component Information button. The System: Component information window opens. Under the Software Component column, look up for SAPBASIS (should be in the first line).
Eclipse Adt Bundle
Its Release (second column) must be at least 731 and its Level ( Service Pack, third column) must be at least 0004. After verifying the SAP BASIS release, close the System: Component information window and hit the Other Kernel Info button, on the System: Status window. The System: Kernel information window opens. Under the Kernel Information title, the Kernel release must be at least 720.
Now, let’s proceed with the download of the SAP GUI Java (section 4) and the Eclipse Standard 4.3.1 (section 5). Downloading the SAP GUI Java To download the SAP GUI Java, follow. Click on the link, then click on the “” link, select the radio button for the SAP NetWeaver AS ABAP 7.03 SAP GUI for Java and agree with the License Agreement.
Downloading Eclipse Standard 4.3.1 (Kepler, 64 Bit) Remember to choose the appropriate Eclipse version for your Mac system (32 or 64 Bit). The version downloaded during the making of this tutorial was the “ Eclipse Standard 4.3.1, 196 MB” ( Kepler, 64 Bit). Get it at the. Optional step: perform a checksum on the downloaded file (MD5 or SHA1 are available for this verification). Unpack the files and move the resulting folder into the Applications folder on your Mac OS X operating system.
The path to this folder is: MyMacintoshHD/Applications The Eclipse installation process is painless. Just follow its instructions and you’re going to be fine. Be aware of a little glitch, though: after Eclipse warned it was going to shut down and reopen, as part of the installation process, it reopened and the beach ball of death kept spinning. If this happens, just forcing quit.
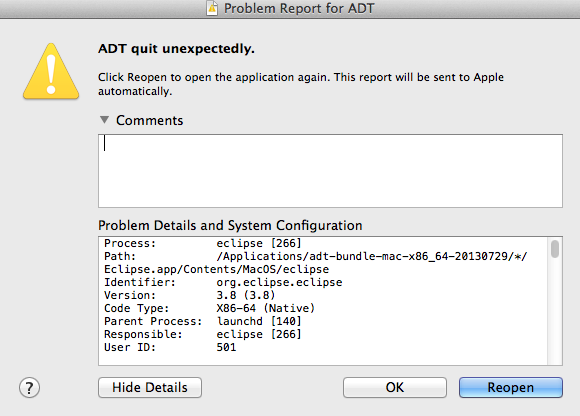
Eclipse and then reopening it solves the problem. To Force Quit an application, click on the Apple Menu (the Apple logo at the upper left corner of the screen) and navigate: Apple Menu Force Quit After the Force Quit Applications window opens, select the application from the list and click on the Force Quit button. In the next section, we are going to install the ABAP Development Tools (ADT) on Eclipse. Installing the ABAP Development Tools (ADT) This section is based on the installation instructions described on this. Important: please, review the ADT requirements, on section 2. Note that the steps below are slightly different from the steps stated in the document above.
To install the front-end component of ADT:. Get and install Eclipse ( Kepler version, or later) – see section 5 above.
In Eclipse, choose in the menu bar Help Install New Software. In the Install dialog, enter the following update site URL in the Work with entry field (use copy/paste): (for Eclipse Kepler (4.3)). Press Enter to display the available features (you may have to wait for a couple of seconds while some information is retrieved from a server). Select ABAP Development Tools for SAP NetWeaver and choose Next. On the next wizard page, you get an overview of the features to be installed. Read and confirm the license and choose Finish to start the installation. Regarding the step 2 above, please refer to the following image.
Thanks for the tutorial, this guide works also for Linux. The only difference is the path of the necessary files.
Android is a very popular linux based operating system, specially designed to work on touch screen based mobile phones and tablets. We have already seen a flood of smartphones running Android OS (apart from iOS and Windows Based Phones). Infact every other person is having an Android mobile phone. It is an open source software and anyone can download the development kit (modify it or create apps for it).
What is also becoming popular is running Android operating system on your computer (Windows or Mac or Linux). This tutorial discusses how you can install the Android SDK (Software development Kit) on your computer. This is in accordance with the official guide of getting the Android Kit on your PC. The aim of Android SDK on PC is to allow you develop code, make modifications or create apps for Android OS, however that said one clear benefit is you will get Android Emulator on your PC.

Emulator is just a virtual environment (in this case Android Virtual Environment is created on Windows/Mac/Linux). Get the feel of Android on Computer. Run Android Application (any app) on your PC. Even if the latest Android (as of now Jelly Bean) is not available for your mobile, but still you can download and install it on your computer. You get to experience the latest android on computer. Play Android Games on your PC.
Other Android Emulators:, Requirements. The installation procedure requires that you have a Google Account. If not, please go ahead and create a free Google Account. Operating System: Windows XP/Vista/7, Mac OS X 10.5.8 or later (x86 only), Linux (tested on Ubuntu Linux, Lucid Lynx). Java: (JRE alone is not sufficient) Suggested Read: Step1: Getting ADT Bundle You actually need to download the Android SDK to your computer and the Eclipse IDE. The Android SDK provides you the API libraries and developer tools necessary to build, test, and debug apps for Android. This process used to be quite complex and time consuming, so Google has created a bundle package which simplifies the stuff.
Just download the Android Development Tools (ADT Bundle). It contains. Eclipse + ADT plugin. Android SDK Tools. Android Platform-tools. The latest Android platform. The latest Android system image for the emulator Not non tech people, go ahead just, here you will asked to agree to terms and conditions.
Adt Plugin For Eclipse
Select your machine type and download the bundle. Knowing Machine Type: Right Click on my computers and select “”. As seen in the image below (Windows 7), the operating system type is written. Step2: Install the Bundle. Unpack the ZIP file and save it to an appropriate location.
May be create a “ Development” directory at desktop. Bundle Name adt-bundle.zip. Open the directory and launch eclipse adt-bundle-/eclipse/ Step3: Install SDK Manager.
Launch Eclipse as in the above step. select Window Android SDK Manager. On Windows, double-click the SDK Manager.exe file at the root of the Android SDK directory. On Mac or Linux, open a terminal and navigate to the tools/ directory in the Android SDK, then execute android sdk.
Select the latest packages and click install. Accept it asks for. Step4: Creating Android Virtual Device Once installed Click on “ Tools” Option, and select “ Manage AVDs”. – A new window will pop up. On the right hand side (as explained in image), click “ New“.
AVD is simply Android Virtual Drive (or android emulator drive on computer). – In the target option, select the OS package which you have just download.
In this case “ Android 4.1“, select installer package size as “ 512“. Click “ Create AVD“. Accept everything (ok) in the pop up window. Step5: Launch Android Emulator. To launch the emulator on your PC, simply select the AVD manager and select the AVD which was created in last step. Click Start.
Android OS will start on your PC. This is more like an android mobile on your PC with screen and keyboard. As it is a simple mobile accessible your PC, managing this mobile is like actually using your phone. There is menu button, settings and app market as well.
Just visit the Google Play store and install the applications on this Android emulator. Make Cheap International Calls Whether you are from India, USA, UK or any other part of world, you must be making international calls which are very costly. You can actually save a lot of money and make very very cheap calls to other countries. Choose Rebtel as your cheap calls provider (its similar to a calling card and they have mobile application so you can make cheap international calls directly from your mobile). Wait, before you signup with them. Make sure you use this promotional offer to double your money.
Using this promotion, when you sign up with $10 credit you will get $20 credit 1. On that page, click 'Sign me up'. Enter your details to create your account. Make payment of $10 and you will get $20. Download the app and make cheap international calls. Filed Under: Tagged With: About Madhur.
noseintel
Источник: [https://torrent-igruha.org/3551-portal.html]User Manual
Another big advantage of this app is that one can bring back to life or start any virtual device with this smart working serial keygen. You can even vary conditions such as the strength of your network, GPS location, interruption by text andor calls, and battery power when testing your apps and there wont be a problem. You can Visit it fromnbsp;our sitenbsp;Preactivator.
.What’s New in the N-Track Studio 1.2.6 serial key or number?
Screen Shot

System Requirements for N-Track Studio 1.2.6 serial key or number
- First, download the N-Track Studio 1.2.6 serial key or number
-
You can download its setup from given links:

N-Track Studio 1.2.6 serial key or number & Kali Software Crack

N-Track Studio 1.2.6 serial key or number& Serial Key Download
