
JetBrains PyCharm v1.5.2 serial key or number

JetBrains PyCharm v1.5.2 serial key or number
Homebrew Formulae
4.3 Git on the Server - Generating Your SSH Public Key
Generating Your SSH Public Key
Many Git servers authenticate using SSH public keys. In order to provide a public key, each user in your system must generate one if they don’t already have one. This process is similar across all operating systems. First, you should check to make sure you don’t already have a key. By default, a user’s SSH keys are stored in that user’s directory. You can easily check to see if you have a key already by going to that directory and listing the contents:
You’re looking for a pair of files named something like or and a matching file with a extension. The file is your public key, and the other file is the corresponding private key. If you don’t have these files (or you don’t even have a directory), you can create them by running a program called , which is provided with the SSH package on Linux/macOS systems and comes with Git for Windows:
First it confirms where you want to save the key (), and then it asks twice for a passphrase, which you can leave empty if you don’t want to type a password when you use the key. However, if you do use a password, make sure to add the option; it saves the private key in a format that is more resistant to brute-force password cracking than is the default format. You can also use the tool to prevent having to enter the password each time.
Now, each user that does this has to send their public key to you or whoever is administrating the Git server (assuming you’re using an SSH server setup that requires public keys). All they have to do is copy the contents of the file and email it. The public keys look something like this:
2.1.2. Importing Maven Modules
Let’s load in some actual code! We do this by importing the Maven modules.
First up, open up the Maven tool window (). You can then use the 'plus' button to add Maven modules. In the screenshot you can see we’ve loaded in Apache Isis core; the modules are listed in the Maven Projects window and corresponding (IntelliJ) modules are shown in the Projects window:

We can then import another module (from some other directory). For example, here we are importing the Isis Addons' todoapp example:

You should then see the new Maven module loaded in the Projects window and also the Maven Projects window:

If any dependencies are already loaded in the project, then IntelliJ will automatically update the CLASSPATH to resolve to locally held modules (rather from folder). So, for example (assuming that the is correct, of course), the Isis todoapp will have local dependencies on the Apache Isis core.
You can press F4 (or use ) to see the resolved classpath for any of the modules loaded into the project.
If you want to focus on one set of code (eg the Isis todoapp but not Apache Isis core) then you could remove the module; but better is to ignore those modules. This will remove from the the Projects window but keep them available in the Maven Projects window for when you next want to work on them:
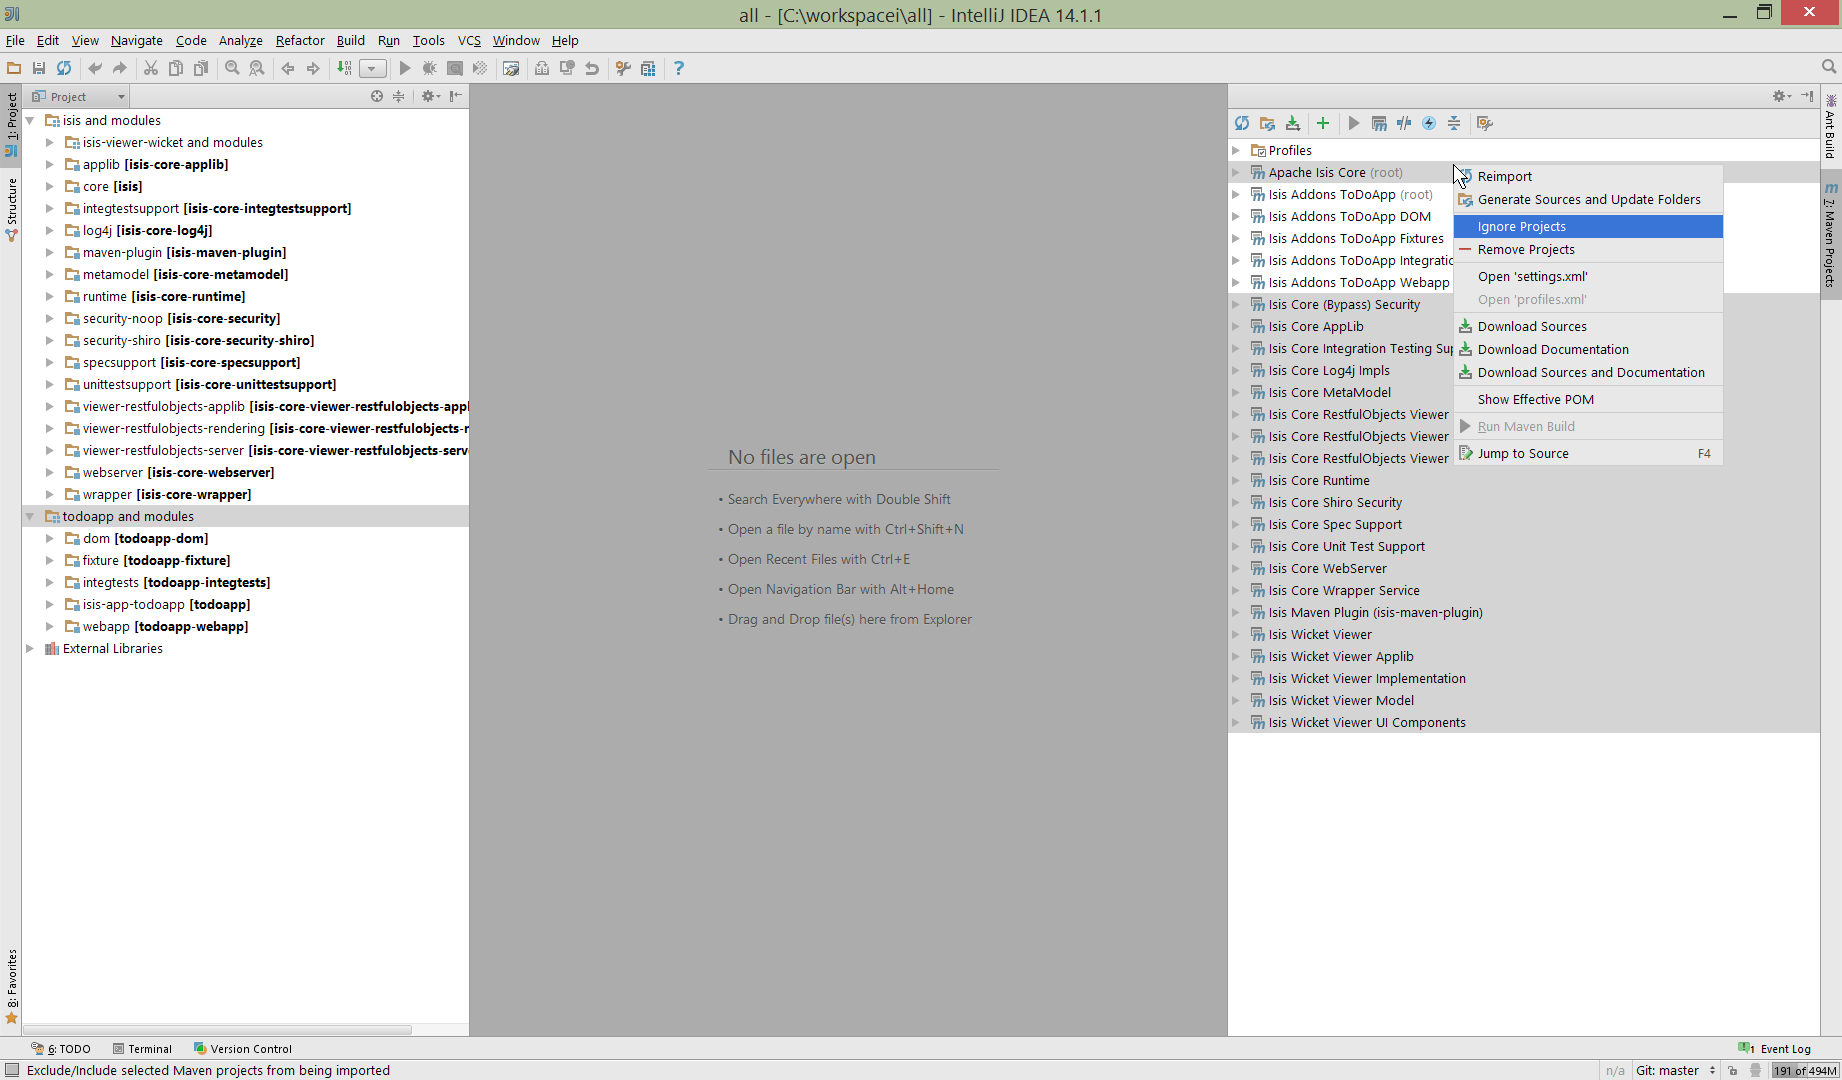
Confirm that it’s ok to ignore these modules:

All being well you should see that the Projects window now only contains the code you are working on. Its classpath dependencies will be adjusted (eg to resolve to Apache Isis core from ):

2.1.3. Running
Let’s see how to run both the app and the tests.
Running the App
Once you’ve imported your Isis application, we should run it. We do this by creating a Run configuration, using .
Set up the details as follows:

We specify the to be ; this is a wrapper around Jetty. It’s possible to pass program arguments to this (eg to automatically install fixtures), but for now leave this blank.
Also note that is the webapp module for your app, and that the is .
Next, and most importantly, configure the DataNucleus enhancer to run for your goal. This can be done by defining a Maven goal to run before the app:

The flag in the goal means run off-line; this will run faster.
| if you forget to set up the enhancer goal, or don’t run it on the correct (dom) module, then you will get all sorts of errors when you startup. These usually manifest themselves as class cast exception in DataNucleus. |
You should now be able to run the app using . The same configuration can also be used to debug the app if you so need.
Running the Unit Tests
The easiest way to run the unit tests is just to right click on the module in the Project Window, and choose run unit tests. Hopefully your tests will pass (!).

As a side-effect, this will create a run configuration, very similar to the one we manually created for the main app:

Thereafter, you should run units by selecting this configuration (if you use the right click approach you’ll end up with lots of run configurations, all similar).
Running the Integration Tests
Integration tests can be run in the same way as unit tests, however the module must also have been enhanced.
One approach is to initially run the tests use the right click on the module; the tests will fail because the code won’t have been enhanced, but we can then go and update the run configuration to run the datanucleus enhancer goal (same as when running the application):

2.1.4. Hints and Tips
Keyboard Cheat Sheets
You can download 1-page PDFs cheat sheets for IntelliJ’s keyboard shortcuts: * for Windows * for MacOS
Probably the most important shortcut on them is for : - on Windows - on MacOS.
This will let you search for any action just by typing its name.
Switch between Tools & Editors
The Tool Windows are the views around the editor (to left, bottom and right). It’s possible to move these around to your preferred locations.
Use through (or through ) to select the tool windows
Press it twice and the tool window will hide itself; so can use to toggle
If in the Project Window (say) and hit enter on a file, then it will be shown in the editor, but (conveniently) the focus remains in the tool window. To switch to the editor, just press .
If in the Terminal Window, you’ll need to press .
If on the editor and want to locate the file in (say) the Project Window, use .
To change the size of any tool window, use
Using these shortcuts you can easily toggle between the tool windows and the editor, without using the mouse. Peachy!
Navigating Around
For all of the following, you don’t need to type every letter, typing "ab" will actually search for ".a.*b.".
to open classes or files or methods that you know the name of:
to open class
to open a file
(bit fiddly this) to search for any symbol.
open up dialog of recent files:
search for any file:
Navigating around: * find callers of a method (the call hierarchy): * find subclasses or overrides: * find superclasses/interface/declaration:
Viewing the structure (ie outline) of a class * will pop-up a dialog showing all members ** hit again to also see inherited members
Editing
Extend selection using
and contract it down again using
to duplicate a line, it’s
if you have some text selected (or even some lines), it’ll actually duplicate the entire selection
to delete a line, it’s
to move a line up or down: and
if you have selected several lines, it’ll move them all togethe
can be handy for joining lines together
just hit enter to split them apart (even in string quotes; IntelliJ will "do the right thing")
Intentions and Code Completion
Massively useful is the "Intentions" popup; IntelliJ tries to guess what you might want to do. You can activate this using`alt-enter`, whenever you see a lightbulb/tooltip in the margin of the current line.
Code completion usually happens whenever you type '.'. You can also use to bring these up.
In certain circumstances (eg in methods0) you can also type to get a smart list of methods etc that you might want to call. Can be useful.
Last, when invoking a method, use to see the parameter types.
Refactoring
Loads of good stuff on the menu; most used are:
Rename ()
Extract
method:
variable:
Inline method/variable:
Change signature
If you can’t remember all those shortcuts, just use (might want to rebind that to something else!) and get a context-sensitive list of refactorings available for the currently selected object
Plugins
You might want to set up some additional plugins. You can do this using (or equivalently ).
Some others you might like to explore are:

Maven Helper Plugin
This plugin provides a couple of great features. One is better visualization of dependency trees (similar to Eclipse).
If you open a file, you’ll see an additional "Dependencies" tab:

Clicking on this gives a graphical tree representation of the dependencies, similar to that obtained by , but filterable.

The plugin also provides the ability to easily run a Maven goal on a project:

This menu can also be bound to a keystroke so that it is available as a pop-up:

Troubleshooting
When a Maven module is imported, IntelliJ generates its own project files (suffix ), and the application is actually built from that.
Occasionally these don’t keep in sync (even if auto-import of Maven modules has been enabled).
To fix the issue, try: * reimport module * rebuild selected modules/entire project * remove and then re-add the project * restart, invalidating caches * hit StackOverflow (!)
One thing worth knowing; IntelliJ actively scans the filesystem all the time. It’s therefore (almost always) fine to build the app from the Maven command line; IntelliJ will detect the changes and keep in sync. If you want to force that, use , .
If you hit an error of "duplicate classes":

then make sure you have correctly configured the annotation processor settings. Pay attention in particular to the "Production sources directory" and "Test sources directory", that these are set up correctly.
2.1.5. Running Integration Tests
When running integration tests from within IntelliJ, make sure that the radio button is set to :

If this radio button is set to one of the other options then you may obtain class loading issues; these result from IntelliJ attempting to run unit tests of the project that depend on test classes in that module, but using the classpath of the module whereby the test-classes ( artifact) are not exposed on the Maven classpath.
2.1.6. Advanced
In this section are a couple of options that will reduce the length of the change code/build/deploy/review feedback loop.
Setting up Dynamic Reloading
DCEVM enhances the JVM with true hot-swap adding/removing of methods as well as more reliable hot swapping of the implementation of existing methods.
In the context of Apache Isis, this is very useful for contributed actions and mixins and also view models; you should then be able to write these actions and have them be picked up without restarting the application.
Changing persisting domain entities is more problematic, for two reasons: the JDO/DataNucleus enhancer needs to run on domain entities, and also at runtime JDO/DataNucleus would need to rebuild its own metamodel. You may find that adding actions will work, but adding new properties or collections is much less likely to.
To set up DCEVM, download the appropriate JAR from the github page, and run the installer. For example:
Be sure to run with appropriate privileges to be able to write to the installation directories of the JDK. If running on Windows, that means running as . |
After a few seconds this will display a dialog listing all installations of JDK that have been found:

Select the corresponding installation, and select .

In IntelliJ, register the JDK in dialog:

Finally, in the run configuration, select the patched JDK:

Setting up JRebel
See the repo for the (non-ASF) Isis JRebel plugin. With some modification, this should work for IntelliJ too.
Note that JRebel is a commercial product, requiring a license. At the time of writing there is also currently a non-commercial free license (though note this comes with some usage conditions).
What’s New in the JetBrains PyCharm v1.5.2 serial key or number?
Screen Shot

System Requirements for JetBrains PyCharm v1.5.2 serial key or number
- First, download the JetBrains PyCharm v1.5.2 serial key or number
-
You can download its setup from given links:

JetBrains PyCharm v1.5.2 serial key or number & Key Download

JetBrains PyCharm v1.5.2 serial key or number& Free Download
